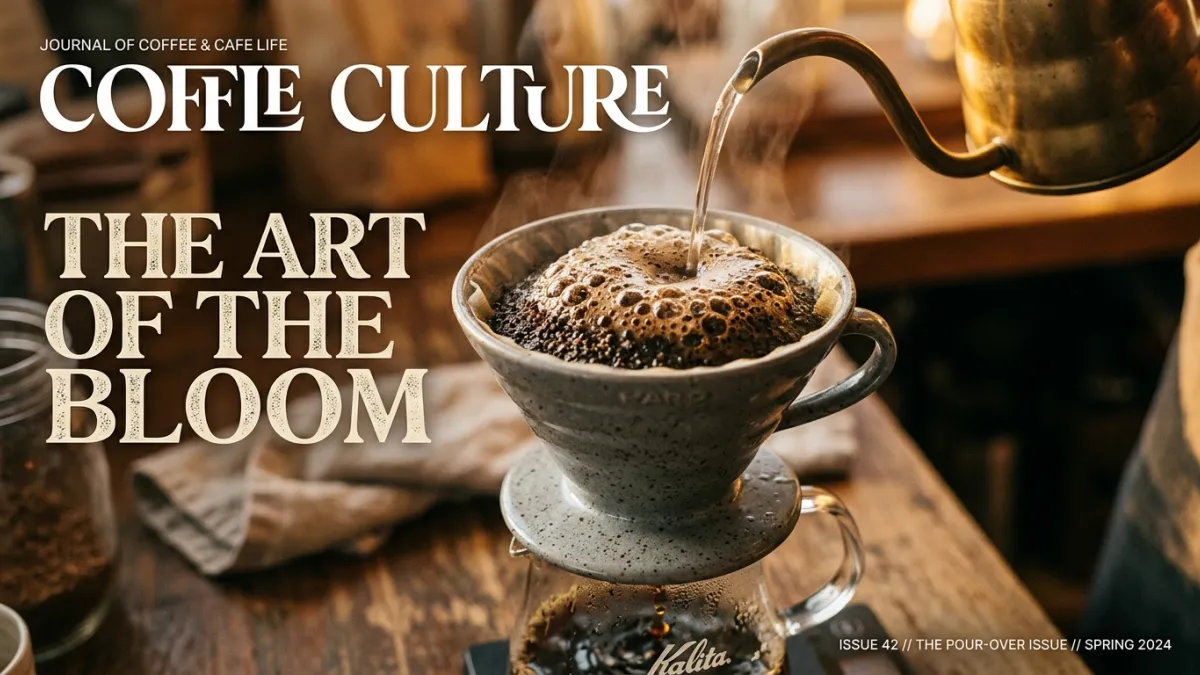
If you have ever watched a skilled barista pour hot water over fresh coffee grounds, you likely noticed an captivating transformation. The ground coffee swells up like a freshly baked muffin, bubbling and releasing a rush of rich, aromatic vapor into the air. This phenomenon is known as the coffee bloom, and it represents far more than just a pleasing visual show at your kitchen counter. Understanding the mechanics of the bloom is one of the most effective ways to elevate your everyday brewing, bridging the gap between a bitter, uneven mug and a sweet, balanced cup of specialty coffee.
Quick answer: The coffee bloom occurs when hot water hits freshly ground coffee, causing rapid degassing of trapped carbon dioxide gas left behind from roasting. Allowing 30 to 45 seconds for this gas to escape prevents CO2 from repelling brew water, ensuring uniform saturation and optimal flavor extraction across every particle.
The Chemistry Behind the Coffee Bloom
To understand why coffee blooms, you have to look into what happens inside the bean during the thermal processing of roasting. As green coffee beans are heated inside a drum or hot-air roaster to temperatures exceeding 200°C (392°F), thermal degradation occurs. Complex carbohydrates break down, organic acids transform, and organic compounds produce carbon dioxide (CO2) gas within the cellular structure of the bean. A significant portion of this gas stays trapped inside microscopic pores within the roasted cellular matrix, slowly escaping over several weeks after roasting.
When you grind your beans and subject them to hot water, thermal shock occurs. Water between 90°C and 96°C (195°F–205°F) rapidly penetrates the cellular walls, forcing the trapped carbon dioxide to expand exponentially and escape into the open air. This sudden release pushes the grounds outward and forms dynamic gas bubbles on top of the brewing bed. Darker roasts expand more dramatically because extended roast times create higher internal gas pressures, whereas lighter roasts exhibit a subtle, denser bloom due to their tighter organic structure.
The intensity of your bloom serves as a direct freshness meter for your coffee supply. Whole beans stored properly usually peak in carbon dioxide content between 4 and 14 days post-roast, offering an ideal balance of degassing potential and peak aromatics. If your ground coffee remains flat and completely unresponsive when water touches it, the beans have likely lost their gas content alongside delicate volatile aromatic oils, indicating that your coffee is stale.
Why Blooming Matters for Flawless Extraction
The primary functional objective of the bloom stage is preventing channel formation during extraction. Carbon dioxide gas is naturally hydrophobic, meaning it actively repels water when locked inside the ground coffee bed. If you bypass the blooming step and pour all your brewing water at once, the escaping gas creates air pockets and high-pressure routes. Water naturally flows through these paths of least resistance, leaving large clusters of coffee dry and unextracted while over-extracting the channels, resulting in a harsh mixture of sourness and astringency.
According to specialty coffee Association (SCA) brewing guidelines, balanced coffee extraction requires extracting roughly 18% to 22% of the total soluble solids from the dry bed, reaching a total dissolved solids (TDS) concentration between 1.15% and 1.45%. Reaching this ideal window is nearly impossible without uniform saturation during the first 30 seconds. Degassing clears the pathway for hot water to evenly dissolve desirable compounds like sweet sugars, pleasant organic acids, and nuanced aromatic oils.
Barista's tip: When brewing with dense, high-altitude light roasts on a Hario V60, extend your bloom time to 45 or even 50 seconds and gently swirl the brewer twice immediately after pouring your bloom water. This mechanical agitation breaks up dry pockets at the bottom of the filter cone without causing unwanted channel formation in the main brew phase.
Beyond liquid hydrodynamics, residual carbon dioxide carries an unpleasant carbonic, sour acidity into your finished cup. When CO2 dissolves into water during extraction without escaping into the atmosphere, it forms mild carbonic acid. Blooming eliminates this excess gas prior to main percolation, ensuring that the natural malic, citric, or phosphoric acidities inherent to high-grade Arabica coffee shine through cleanly without acidic harshness.
Step-by-Step Guide to Blooming Your Coffee Properly
Executing a controlled bloom requires precise measurements rather than rough guesswork. For standard pour-over devices such as the Chemex, Kalita Wave, or Hario V60, rely on a digital scale equipped with a built-in timer to ensure consistent, repeatable results. Here is the step-by-step protocol for achieving an optimal bloom during your morning routine:
- Dose and Grind: Measure 18 g of freshly roasted coffee beans and grind them to a medium-fine consistency (roughly 600–800 microns, similar to coarse sea salt) using a quality burr grinder like the Baratza Encore.
- Pre-wet Filter and Tare: Insert your paper filter into the dripper, rinse thoroughly with boiling water to remove papery taste, discard the rinse water, and place your vessel on the digital scale before taring it to zero.
- Add Grounds and Level: Add the 18 g dose into the filter and tap the sides gently to level the coffee bed surface, creating a flat foundation for even water distribution.
- Pour the Bloom Water: Start your timer and quickly pour 36 g to 54 g of filtered water heated to 93°C (200°F)—utilizing a gooseneck kettle such as the Fellow Stagg EKG. Target a bloom liquid ratio between 2:1 and 3:1 relative to your dry coffee weight.
- Saturate and Wait: Pour in concentric spirals starting from the center outward, avoiding direct contact with the paper filter walls. Allow the bed to bloom untouched for 30 to 45 seconds until active bubbling subsides completely.
Once the bubbling slows down and the bed flattens slightly, proceed with your scheduled main pours to complete your total targeted yield (for an 18 g dose at a 1:16 ratio, your final target water weight will be 288 g). Maintaining control during this foundational step sets the trajectory for an evenly extracted, clean final cup.
Comparing Bloom Parameters Across Popular Brew Methods
Different brewing equipment requires minor adjustments to bloom water volume, duration, and mechanical motion to achieve optimal results. The table below outlines recommended operational parameters for popular home brewing devices:
| Brewing Method | Recommended Dose | Bloom Ratio (Water:Coffee) | Bloom Water Volume | Target Bloom Time | Recommended Grind Size |
|---|---|---|---|---|---|
| Hario V60 Dripper | 18 g | 2.5:1 to 3:1 | 45 g – 54 g | 30 – 45 seconds | Medium-Fine (600–700 μm) |
| Chemex Brewer | 30 g | 2:1 to 2.5:1 | 60 g – 75 g | 45 – 60 seconds | Medium-Coarse (800–1000 μm) |
| AeroPress (Standard) | 15 g | 3:1 to 4:1 | 45 g – 60 g | 30 seconds | Fine-Medium (500–600 μm) |
| French Press | 30 g | 2:1 | 60 g | 30 seconds | Coarse (1000–1200 μm) |
While drip pour-overs benefit heavily from structural degassing during the bloom phase, immersion devices like the French Press handle gas differently. In full immersion brewing, grounds remain surrounded by water throughout the 4-minute steep time, but an initial 30-second bloom still helps sink floating coffee particles, promoting full extraction and preventing dry crust formation at the surface.
Troubleshooting: Why Isn't Your Coffee Blooming?
If you perform your pour and observe almost no movement, minimal swell, or complete absence of bubbling, your brewing variables require inspection. The primary culprit is bean age. Coffee roasted several months ago has long finished off-gassing into its packaging, leaving behind porous, oxygenated beans incapable of blooming properly or delivering sweet, complex flavors.
Grind size and water thermal dynamics also heavily dictate bloom responsiveness. A excessively coarse grind allows water to fall straight through the slurry before grounds absorb heat and release trapped gases. Conversely, water below 88°C (190°F) lacks sufficient thermal energy to trigger rapid gas expansion, yielding a weak bloom and flat taste.
To remedy a weak bloom, ensure your beans feature a clearly stamped roast date within 7 to 21 days of use, refine your grind size down toward medium-fine, and keep your water temperature within the target 90°C–96°C (195°F–205°F) range. Buying whole-bean specialty coffee and grinding immediately before brewing is the single most impactful upgrade you can make to guarantee an energetic bloom every time.
If you want immediate improvement in your daily cup quality, purchase fresh whole beans with a verified roast date within two weeks, set your gooseneck kettle to 93°C (200°F), and use a strict 1:16 dose ratio with a 30-second, 3:1 bloom on a Hario V60 or Chemex pour-over dripper.
Frequently Asked Questions
Should I stir my coffee grounds during the bloom phase?
Gently swirling the dripper or using a bamboo paddle to gently agitate the slurry during the first 10 seconds of the bloom can help ensure total wetness without leaving dry pockets. However, excessive stirring can clog paper filter pores with fine particles, drastically slowing down pour-over drawdown times.
Do espresso machines require a coffee bloom?
Espresso machines utilize high mechanical pressure (typically 9 bar) to force water through fine grounds in under 30 seconds, overcoming CO2 resistance through sheer pressure. Modern espresso machines often incorporate pre-infusion—a low-pressure saturation phase that functions similarly to a bloom by wetting the puck before full brewing pressure hits.
Can you bloom coffee when making cold brew?
Yes, blooming cold brew grounds with a small amount of hot water (heated to 93°C) for 45 seconds before pouring in cold water helps unlock stubborn aromatic compounds and delicate acids that cold water alone cannot efficiently extract over long immersion times.