Unlock Coffee Flavors: Your Beginner's Guide to Cupping at Home
Hey coffee lover! Ever wondered how professional tasters pinpoint those wild berry, chocolate, or floral notes in a cup? It's not magic; it's a disciplined process called cupping. And guess what? You can absolutely do it at home! Cupping is the industry standard for evaluating coffee quality, but it's also a fantastic way for us home baristas to truly understand the beans we're brewing and refine our palate.
Think of this as your friendly introduction to unlocking a whole new world of coffee flavors. By the end of this guide, you'll be set up to taste coffee like never before, helping you choose better beans and even improve your daily brewing.
Why Cupping? Beyond Just Drinking
Cupping is more than just tasting; it’s a systematic method to:
- Identify Flavor Notes: Train your palate to detect specific attributes like acidity, sweetness, body, and distinct flavors.
- Evaluate Bean Quality: Understand why one coffee tastes better than another.
- Compare Coffees: The standardized method allows for direct, unbiased comparison between different roasts or origins.
- Improve Your Brewing: By understanding a coffee's inherent characteristics, you can adjust your brewing methods to highlight its best qualities.
What You'll Need: Gathering Your Home Cupping Kit
You don't need fancy lab equipment to start. Most of these items might already be in your kitchen:
- Freshly Roasted Coffee Beans: At least two different coffees for comparison. This is key!
- Burr Grinder: A consistent grind is crucial. A good burr grinder (like the Baratza Encore or a decent hand grinder) is a must.
- Cupping Bowls: Small, heat-safe bowls, ideally 6-8 oz (180-240ml) capacity. Ceramic ramekins or even small cereal bowls work perfectly. You'll need one per coffee, plus a couple extra for rinsing spoons.
- Spoons: Deep soup spoons are ideal for slurping.
- Kettle: Any kettle will do, but a gooseneck kettle offers better pouring control.
- Accurate Scale: Essential for precise coffee and water measurements (accurate to 0.1g).
- Timer: Your phone timer is fine.
- Hot Water: Filtered water heated to 92-96°C (198-205°F).
- Notebook & Pen (or Cupping Form): For jotting down your observations.
The Cupping Process: Step-by-Step for Beginners
Ready? Let's get started!
Step 1: Preparation is Key
- Measure Your Coffee: For cupping, we use a standard ratio of 1:18 coffee to water. For a typical 6.5 oz (approximately 200ml) bowl, you'll need around 11 grams of coffee. Measure each coffee into its own bowl.
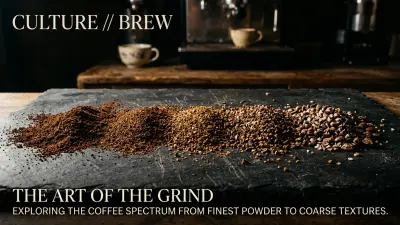
- Grind Consistency: Grind your coffee to a coarse consistency, similar to French Press coffee. It should look like coarse sea salt. Grind each coffee separately just before you start, and ensure your grinder is clean between each batch to prevent cross-contamination of aromas. Place the grounds directly into their respective bowls.
- Heat Your Water: Get your filtered water to 92-96°C (198-205°F).
Step 2: Dry Fragrance (0 Minutes)
- Once your coffee is ground and in the bowls, gently agitate the grounds and take a deep sniff. This is the "dry fragrance." What do you smell? Is it nutty, fruity, chocolatey, earthy? Make a note. This is the aroma of the dry, ground coffee.
Step 3: Pour & Bloom (0-4 Minutes)
- Start your timer. Pour your hot water directly onto the grounds, ensuring they are fully saturated. Pour gently to avoid disturbing the coffee bed too much. Fill each bowl to the brim.
- Let the coffee sit undisturbed for exactly 4 minutes. You'll notice a "crust" forming on top.
Step 4: Breaking the Crust & Wet Aroma (4 Minutes)
- At the 4-minute mark, grab a clean spoon. Gently push the floating coffee crust towards the back of the bowl, breaking it. As you break the crust, put your nose close to the surface and take a deep breath. This is the "wet aroma." How does it differ from the dry fragrance? Is it more intense, or do new smells emerge?
- After breaking the crust, use two spoons to carefully skim off any remaining foam and floating coffee particles. This ensures a clean tasting experience.
Step 5: Cupping (Tasting!) (8-15+ Minutes)
- Now for the fun part! Wait until the coffee has cooled sufficiently, usually around 8-10 minutes from the initial pour. If it’s too hot, you won't taste much.
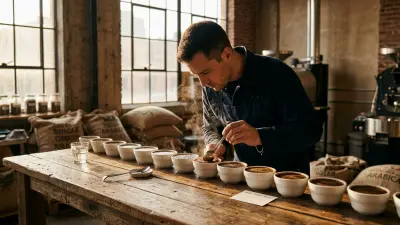
- Slurp! Yes, really! Take a spoonful of coffee and loudly slurp it into your mouth. This aerates the coffee, spreading it across your entire palate and allowing volatile aromatics to reach your olfactory senses (your nose).
- As you slurp, focus on these attributes:
- Acidity: Is it bright and citrusy, like lemon? Or tart, like green apple? Or perhaps dull?
- Body: How does it feel in your mouth? Is it light and tea-like, or heavy and syrupy?
- Sweetness: Is there a pleasant, sugary sweetness, or is it absent?
- Flavor Notes: What specific flavors can you identify? Think broadly first (fruity, nutty, chocolatey, floral, spicy), then try to narrow it down (blueberry, almond, dark chocolate, jasmine, cinnamon).
- Aftertaste: What lingering flavors or sensations do you experience after swallowing? Is it pleasant and long-lasting?
- Taste Multiple Times: As the coffee cools further (from 10 to 15+ minutes), its flavors will evolve. Taste each coffee every few minutes, noting how the acidity, sweetness, and flavor notes change.
Step 6: Evaluate & Compare
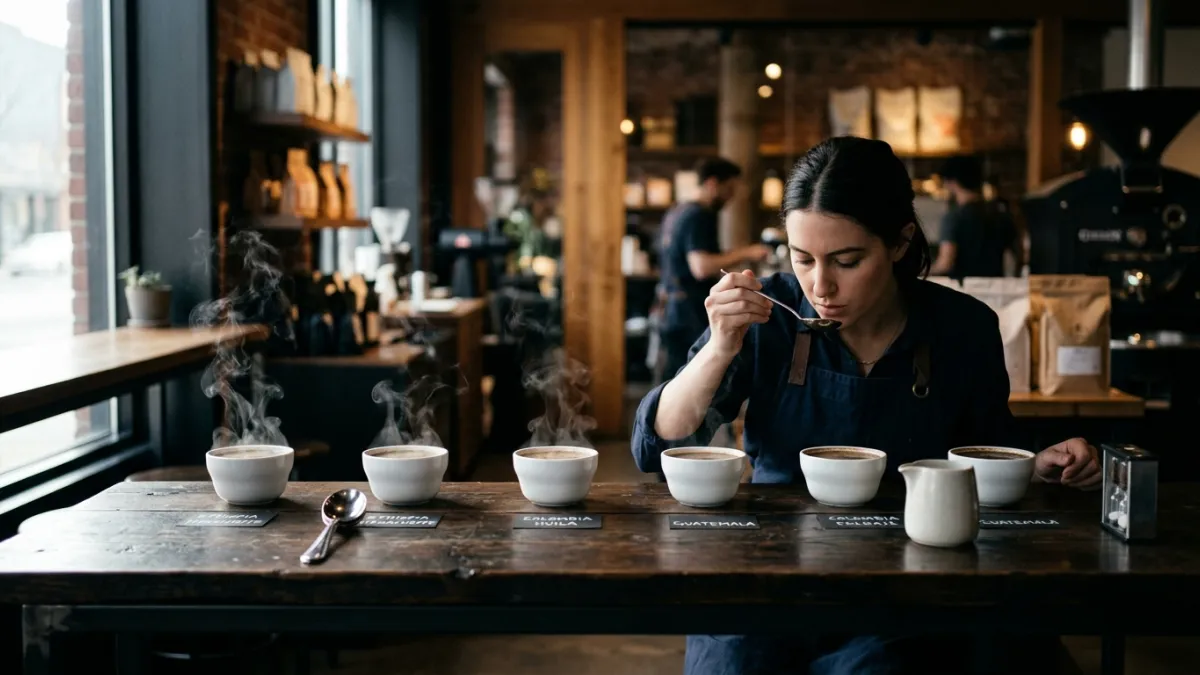
- Go back and forth between the different coffees you prepared. Compare them directly. Which one has more body? Brighter acidity? More interesting flavor notes?
- Don't be afraid to use a Coffee Taster's Flavor Wheel as a guide. It's a fantastic tool to help you articulate what you're tasting.
- Keep detailed notes. The more you write down, the faster your palate will develop.
Tips for Beginner Cuppers
- Don't Be Intimidated: Everyone starts somewhere. Your first few cuppings might feel overwhelming, but practice makes perfect.
- Start Simple: Begin by comparing coffees with distinct differences (e.g., a dark roast vs. a light roast, or a single origin vs. a blend).
- Use Reference Points: If you taste "fruity," think of specific fruits you know well. Taste actual lemons, apples, and chocolate to calibrate your palate.
- Focus on One Attribute at a Time: During your first pass, just focus on acidity. On the second, focus on body, and so on.
- Practice Regularly: The more you cup, the better you'll become at discerning subtle differences.
Cupping is a journey, not a destination. It will profoundly change the way you appreciate coffee, making you a more discerning drinker and a more skilled home barista. So grab those bowls, grind some beans, and start exploring the incredible world of coffee flavors!
Happy cupping from your friends at Coffee Brew Hub!