Unlock the Secrets of Your Brew: A Home Cupping Guide
Ever wondered how coffee professionals describe a brew with terms like "bright acidity," "notes of stone fruit," or "chocolatey body"? They're not just guessing; they're utilizing a systematic process called coffee cupping. Traditionally a method for evaluating coffee quality, cupping is also an incredibly powerful tool for the home barista. It empowers you to truly understand the coffees you love, identify nuances, and even pinpoint areas for improving your brewing.
At Coffee Brew Hub, we believe mastery begins with understanding. This beginner's guide will demystify the art of cupping, turning your kitchen into your personal sensory lab. Get ready to taste coffee like never before!
What is Coffee Cupping?
In its essence, coffee cupping is a standardized method for objectively evaluating the sensory characteristics of roasted coffee. It involves observing the dry fragrance, wet aroma, and finally, tasting the coffee at various temperatures as it cools. The consistency of the method allows for direct comparison between different coffees, highlighting their unique attributes and potential defects.
Why Should You Cup Coffee at Home?
You might think cupping is only for professionals, but it offers immense benefits for the home enthusiast:
- Deepen Your Appreciation: Discover a spectrum of flavors you never knew existed in your daily cup.
- Identify Quality: Learn to recognize fresh, well-processed coffee versus stale or defective beans.
- Improve Your Palate: Train your senses to detect specific aromas, flavors, acidity, and body.
- Enhance Your Brewing: Understand how different roasts and origins should taste, guiding your brewing parameters for optimal extraction.
- Compare Coffees: Get a side-by-side comparison of different beans, roasts, or processing methods.
The Essential Tools for Home Cupping
You don't need fancy lab equipment to start cupping. Most items are likely already in your kitchen:
- Small Bowls (3-5 oz / 150-200ml capacity): Ideally ceramic or glass, with a flat bottom. Use at least two per coffee you want to evaluate for consistency.
- Freshly Roasted Coffee: Whole bean, ground just before cupping.
- Grinder: A burr grinder is crucial for consistent particle size.
- Hot Water Kettle: To heat water to approximately 200°F (93°C).
- Cupping Spoon: A deep, wide spoon, often referred to as a soup spoon or a specific cupping spoon.
- Scale: For precise coffee and water measurement.
- Timer: For accurate steep times.
- Cupping Form/Notebook & Pen: To record your observations.
- Flavor Wheel (Optional but Recommended): A visual aid to help you describe flavors.
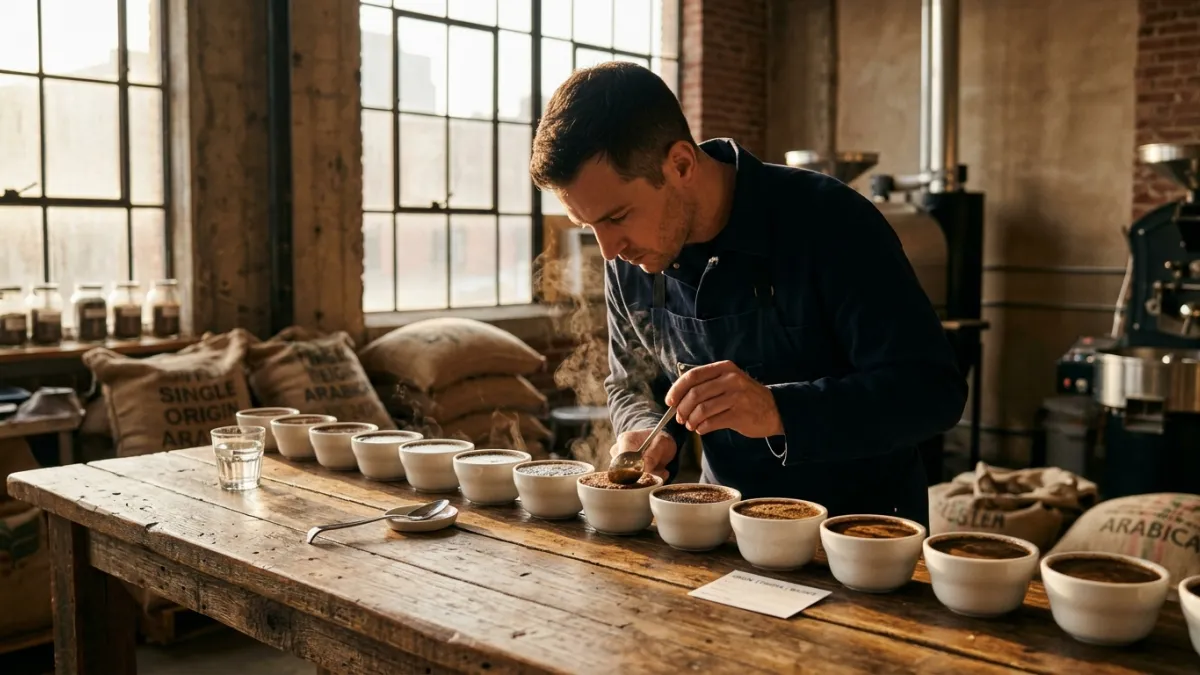
The Cupping Process: A Step-by-Step Guide
Consistency is key. Try to maintain the same ratio and water temperature for all samples.
Step 1: Grind & Assess Dry Aroma
- Measure Coffee: Weigh out 11 grams of whole bean coffee per bowl. For multiple samples, keep them separate.
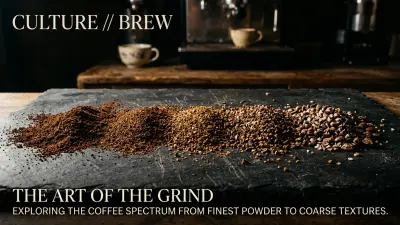
- Grind: Grind each sample to a coarse, consistent consistency, slightly coarser than drip coffee. Place the grounds immediately into their designated bowls.
- Assess Dry Fragrance: Lean in and take a deep sniff of the dry grounds. Note down initial impressions. Are they sweet, nutty, earthy, spicy? This is called the dry fragrance.
Step 2: Add Hot Water & Form the "Crust"
- Pour Water: Start your timer. Gently pour 200ml of hot water (around 200°F / 93°C) over the grounds in each bowl. Ensure all grounds are saturated.
- Observe the Bloom: A "crust" of grounds will form on the surface. Resist the urge to stir! Let the coffee steep undisturbed for exactly 4 minutes.
Step 3: Break the Crust & Assess Wet Aroma
- Break the Crust: After 4 minutes, bring your nose close to the bowl. Gently push the floating crust of grounds back three times with the back of your cupping spoon. This releases the wet aroma. Note the intensity and specific scents.
Step 4: Skim
- Remove Grounds: Using two cupping spoons, carefully skim off and discard the remaining floating grounds and foam from the surface of each bowl. This prevents over-extraction and ensures a clean tasting experience.
Step 5: Taste (The Slurp!)
- Wait to Cool: Allow the coffee to cool for another 6-10 minutes (total 10-14 minutes from initial pour). Tasting coffee too hot can numb your palate. The ideal tasting temperature is usually between 140-160°F (60-70°C).
- Slurp: Take a spoonful of coffee and slurp it loudly and quickly. The slurp aerates the coffee, spreading it across your entire palate and releasing its aromatic compounds. Don't be shy!
- Repeat & Note: Taste each coffee multiple times as it cools, paying attention to how the flavors evolve. Rinse your spoon in hot water between samples to prevent cross-contamination.
Step 6: Analyze & Describe
This is where your notes come in. Use a coffee flavor wheel to help you identify specific notes. Focus on these key attributes:
- Fragrance/Aroma: What did you smell from the dry grounds and after breaking the crust? (e.g., floral, nutty, fruity, smoky)
- Flavor: What tastes do you detect on your tongue? (e.g., chocolate, berry, citrus, caramel)
- Acidity: How bright, crisp, or sour is it? Is it pleasant and sparkling, or harsh and vinegary? (e.g., malic, citric, tartaric)
- Body: What is the mouthfeel? Is it light and tea-like, or heavy and creamy? (e.g., thin, medium, full, buttery)
- Aftertaste/Finish: What flavors linger after you swallow? Is it pleasant, long-lasting, bitter, or clean?
- Balance: Do all the attributes work harmoniously together, or does one dominate?
Tips for the Beginner Cupper
- Start Simple: Begin with 2-3 different coffees, perhaps two distinct origins or two roasts of the same bean.
- Take Good Notes: The more you write, the faster you'll learn. Don't worry about being "wrong"; it's about personal perception.
- Compare: Always cup multiple coffees side-by-side. This makes subtle differences much more apparent.
- Practice Makes Perfect: Your palate will develop over time. The more you cup, the better you'll become at identifying specific attributes.
- Don't Be Afraid to Spit: Professional cuppers spit out the coffee to avoid caffeine overload and palate fatigue. It's okay if you do too!
Your Journey to Coffee Mastery Begins
Cupping is more than just a tasting method; it's a journey of sensory discovery that will profoundly change how you experience coffee. By following this guide, you're not just brewing coffee; you're becoming a more discerning, appreciative, and skilled home barista. So, grab your spoons, set up your bowls, and start unlocking the incredible world of coffee flavors right in your own kitchen!