Hey there, fellow coffee lover! Ever found yourself craving that rich, comforting blend of chocolate and coffee, but felt a regular mocha syrup just wasn't cutting it? You're in luck! Today, we're diving into the art of making a truly exceptional mocha right in your own kitchen, using real, decadent chocolate.
Forget the overly sweet, artificial taste of some cafe mochas. Our goal is to create a harmonious balance where the robust coffee notes shine through, complemented by the deep, complex flavors of genuine chocolate. It’s easier than you think, and the result is a thousand times more satisfying!
Why Real Chocolate Makes All the Difference
Before we jump into the how-to, let's talk about why we're bothering with real chocolate. Store-bought mocha syrups often contain high fructose corn syrup, artificial flavors, and very little actual cocoa. While convenient, they can overwhelm your coffee with sweetness and leave a flat, one-dimensional taste.
Using real chocolate – whether it's chips, a bar, or cocoa powder – allows you to control the quality, sweetness, and depth of flavor. You get those lovely nuanced notes, a richer texture, and a more authentic chocolate experience that truly elevates your mocha from good to absolutely glorious. It’s like the difference between a gourmet dessert and a candy bar!
What You'll Need: Ingredients & Equipment
Gather your tools and treasures, because a great mocha starts with great components.
Essential Ingredients:
- Good Quality Dark Chocolate: We recommend a dark chocolate with 60-75% cocoa solids. This provides a rich, balanced flavor without being too bitter or too sweet. Think around 20-30g (about 0.7-1 oz) per mug.
- Freshly Brewed Espresso: A double shot (approximately 60ml or 2 oz) is ideal. Use your favorite freshly roasted coffee beans for the best flavor.
- Milk: Any milk will do, but whole milk or oat milk tends to froth beautifully, giving you that creamy texture. You'll need about 150-200ml (5-7 oz).
- Optional Toppings: Whipped cream, chocolate shavings, a dusting of cocoa powder, or a drizzle of extra chocolate sauce.
Equipment Checklist:
- espresso machine: For the authentic experience. If you don't have one, a Moka pot or AeroPress can make a strong coffee concentrate.
- Milk Frother/Steamer: Built-in on espresso machines, a dedicated frother, or even a French press or whisk on the stovetop.
- Small Saucepan or Microwave-Safe Bowl: For melting the chocolate.
- Mug: Your favorite coffee mug! A clear glass mug really shows off the layers.
- Spoon or Whisk: For stirring.
Your Step-by-Step Guide to Mocha Magic
Ready to create some magic? Let’s get brewing!
Step 1: Prepare Your Chocolate Dream
- Melt the Chocolate: Break your chocolate bar into small pieces or measure out your chocolate chips. Place them in a small, heat-proof bowl.
- Gentle Heating: You can melt the chocolate in a few ways:
- Double Boiler: Place the bowl over a small saucepan with simmering water (ensure the bowl doesn't touch the water). Stir until smooth and glossy.
- Microwave: Heat in 15-20 second bursts, stirring well after each burst, until completely melted and smooth. Be careful not to burn it!
- Create a Sauce: Once melted, add about 1-2 tablespoons of milk (or even a splash of hot water from your kettle) to the melted chocolate. Whisk until it forms a smooth, pourable sauce. This prevents the chocolate from seizing and helps it blend seamlessly with the coffee.
- Pour into Mug: Pour your luscious chocolate sauce into the bottom of your serving mug.
Step 2: Brew Your Espresso Shot
- Grind Your Beans: Grind your fresh coffee beans to an espresso-fine setting. For a double shot, you'll typically need around 18-20g of coffee.
- Pull Your Shot: Prepare your portafilter and pull a double shot of espresso directly into your mug, over the chocolate sauce. Aim for a brew time of 25-30 seconds for optimal extraction.
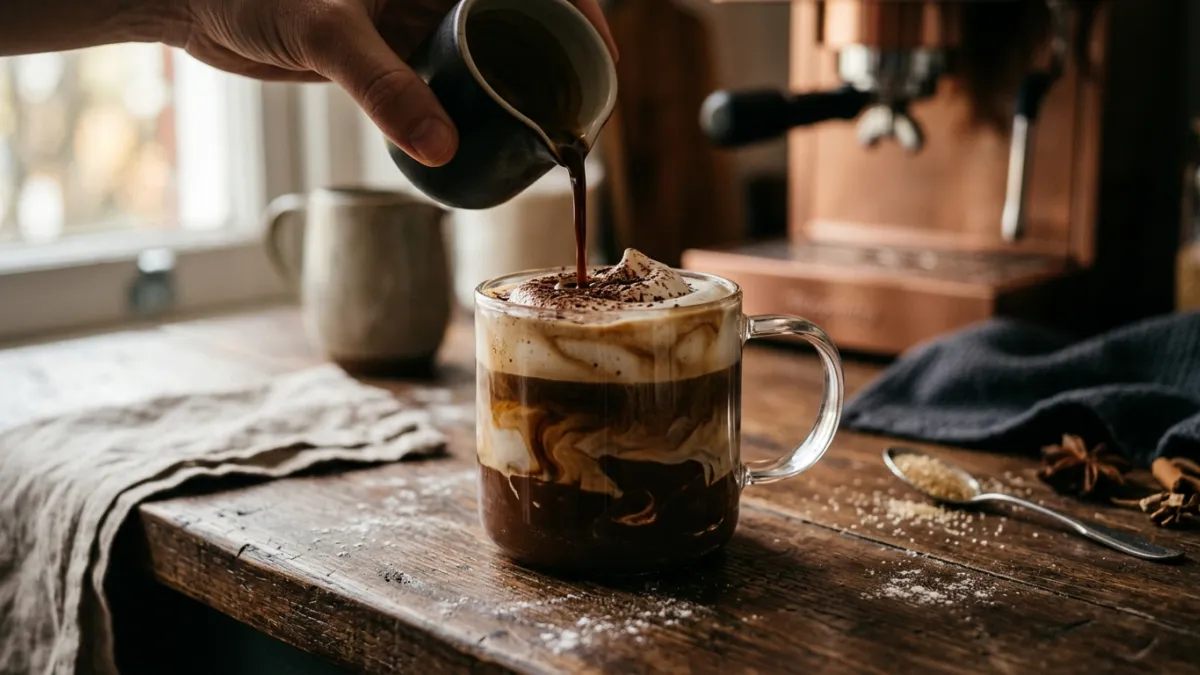
- Stir: Gently stir the hot espresso and chocolate sauce together until thoroughly combined. This creates the rich, dark base of your mocha.
- Moka Pot/AeroPress Alternative: If using a Moka pot, brew a strong, concentrated coffee (using a higher coffee-to-water ratio). For AeroPress, use a fine grind and a 1:2 coffee-to-water ratio for a concentrated shot. Add this concentrate to your chocolate.
Step 3: Steam Your Milk to Perfection
- Pour Milk: Fill your milk pitcher with cold milk, just below the spout's indentation (around 150-200ml for one mocha).
- Steam: If using an espresso machine, purge the steam wand. Submerge the tip just below the surface of the milk to introduce air (the "hissing" sound), creating microfoam. Once the milk has expanded slightly and feels warm, submerge the wand deeper to heat the milk to around 140-155°F (60-68°C). The pitcher should be almost too hot to touch.
- Swirl & Tap: Once steamed, turn off the wand and wipe it clean immediately. Swirl the milk gently in the pitcher to incorporate the foam and eliminate any large bubbles. Tap the pitcher lightly on the counter to break up any remaining bubbles. You're aiming for glossy, velvety microfoam.
- Frothing Alternatives: If you don't have a steamer, heat milk gently in a saucepan on the stove. Once warm, use a whisk, French press (plunge rapidly), or a handheld frother to create foam.
Step 4: Assemble Your Masterpiece
- Pour the Milk: Hold your mug at an angle. Slowly pour the steamed milk into the espresso and chocolate mixture, allowing the rich, velvety microfoam to cascade in. If you're feeling fancy, try some latte art!
Step 5: Garnish and Enjoy
- Add Toppings: This is where you personalize it! A dollop of whipped cream and a sprinkle of chocolate shavings, a drizzle of extra chocolate sauce, or a dusting of cocoa powder.
- Sip and Savor: Take a moment to appreciate your handcrafted creation. You've earned it!
Pro Tips for Mocha Mastery
- Experiment with Chocolate: Try different cocoa percentages. A 70% dark chocolate will give a more intense, less sweet mocha, while a 60% might be smoother. You can even try a pinch of sea salt with dark chocolate for an elevated flavor.
- Don't Burn the Chocolate: Overheated chocolate becomes grainy and loses its smooth texture. Low and slow is the way to go.
- Milk Temperature Matters: Overheating milk can scald it, giving it an unpleasant taste. Use a thermometer if you're unsure, or rely on the pitcher being too hot to hold comfortably.
- Cleanliness is Key: Always wipe your steam wand immediately after use to prevent milk from drying and clogging it.
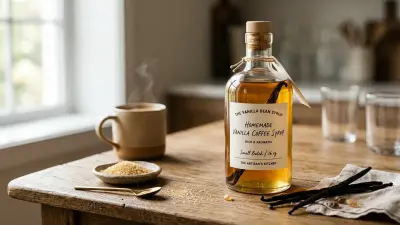
- Adjust to Taste: These ratios are a starting point! If you prefer a sweeter mocha, add a tiny bit more chocolate or a touch of simple syrup. For a stronger coffee flavor, adjust your espresso shot.
Conclusion
And there you have it – a truly delicious, café-quality mocha made with real chocolate, crafted by your own hands! It's a delightful treat that brings together the best of both worlds, perfect for a cozy morning or an afternoon pick-me-up.
Practice makes perfect, so don't be shy about experimenting with different chocolates or brewing methods. Share your mocha creations with us at Coffee Brew Hub – we love seeing what you're brewing! Enjoy every luxurious sip!