Quick answer: Crafting a coffee blend at home requires pairing complementary single-origin beans using a base coffee (50–70% of your total mix) for body, paired with high-acidity or highly aromatic accent beans (30–50%). The most accessible method for home baristas is post-roast blending: brew each bean separately, measure ratios in liquid form, and combine them before committing to a full bag of whole beans.
Understanding the Basics of Coffee Blending
Coffee blending is both a science and an sensory art form. When single-origin coffees undergo cupping according to Specialty Coffee Association (SCA) protocols, tasters evaluate distinct variables: sweetness, acidity, body, balance, and finish. While micro-lot single origins shine because of their distinct, location-specific characteristics, they occasionally lack balance—a vibrant Kenyan coffee might offer striking blackcurrant acidity but feel thin on body, while a washed Sumatran coffee provides immense heavy body with almost no lively acidity. Combining them bridges those gaps to create a harmonized flavor profile.
Before mixing whole beans, you must decide between pre-roast and post-roast blending. Pre-roast blending involves mixing raw green coffee beans together and roasting them in a single batch. While this ensures uniform batch integration, green beans from different regions feature varying moisture contents, bean densities, and screen sizes. A dense, high-altitude Ethiopian bean will roast at a completely different rate than a softer, lower-altitude Brazilian Santos, leading to uneven roasting where one bean scorches while the other remains under-developed.
Post-roast blending is the industry gold standard for specialty coffee enthusiasts and home baristas alike. By roasting each origin individually to its optimal roast level—or purchasing roasted single-origin bags from reputable craft roasters—you preserve the maximum flavor potential of each component. Post-roast blending gives you micro-level precision when measuring weights on a digital scale down to 0.1 grams, ensuring completely reproducible results every time you brew.
Building Your Blend: Ratios and Base Beans
Creating a successful custom blend relies on establishing a clear component hierarchy. A well-constructed blend typically relies on two to three distinct origin types: the base component, the accent component, and optionally, a high-note component. Trying to blend four or more coffees at home usually results in muddy, indistinct flavor profiles where individual nuance is completely lost.
Your base bean makes up roughly 50% to 70% of your total dose. Base beans should feature high natural sweetness, low to moderate acidity, and a robust body that supports the blend structure. Natural-process Brazilian coffees, washed Colombian Excelso, or classic Central American origins (such as Guatemalan Huehuetenango) serve as ideal foundations. They contribute deep notes of milk chocolate, toasted hazelnut, and brown sugar that coat the palate without overpowering other flavor nuances.
Accent beans comprise the remaining 30% to 50% of the blend, adding punchy acidity, floral aromas, or complex fruitiness. A high-altitude washed Ethiopian Yirgacheffe adds delicate Jasmine floral aromatics and bergamot citrus notes, while a natural-process Panamanian or Kenyan coffee introduces intense berry fruit notes. If you want to build a dense, syrupy espresso profile, integrating a washed Indian Monsooned Malabar or a high-grade Robusta (at 10–15%) drastically increases crema production and heavy tactile mouthfeel.
Barista's tip: When testing potential blends, never mix large batches of whole beans upfront. Instead, grind each single-origin bean separately using identical burr settings on a quality conical or flat burr grinder like a Baratza Encore or Fellow Ode. Prepare separate drip or cupping bowls, then combine the brewed liquids in precise volumetric ratios using a graduated cylinder or scale. Liquid blending prevents bean-retention errors and saves expensive specialty coffee from being wasted on unsuccessful test profiles.
Step-by-Step Guide to Blending at Home
To produce consistent, repeatable results at home, adopt a methodical approach similar to professional cupping labs. Working with precise parameters removes guessing games and helps you identify exact brew dynamic shifts when altering ratios.
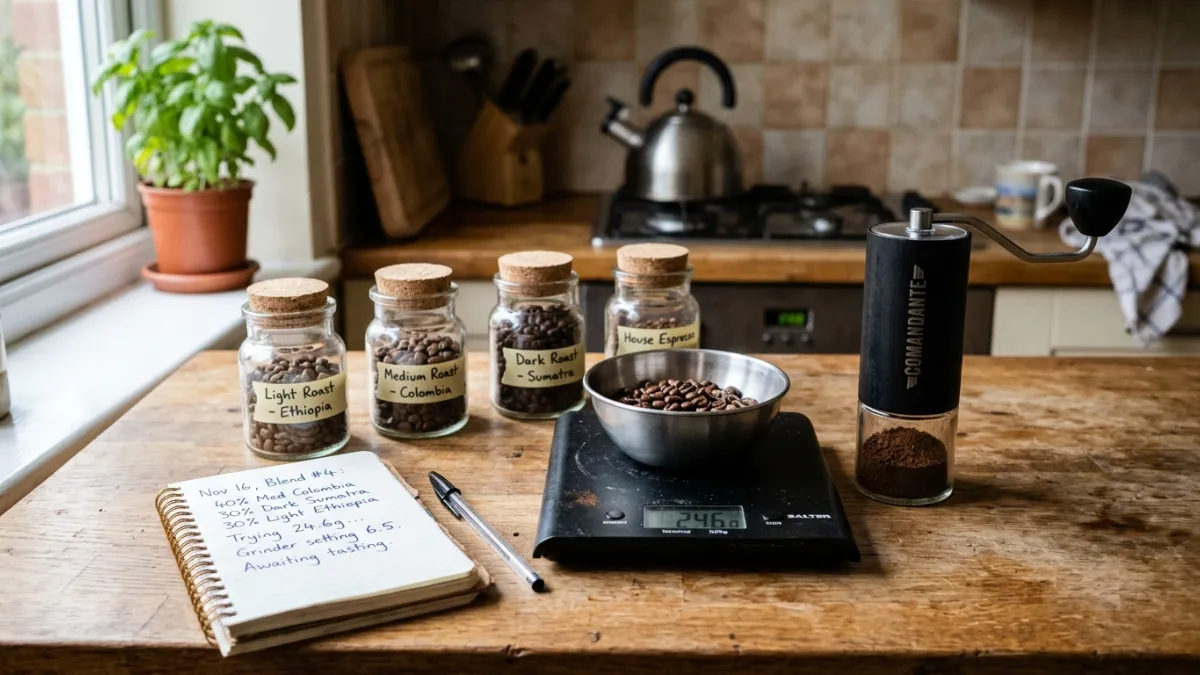
- Gather your equipment: Prepare a precision digital scale (0.1g resolution), small cupping bowls or glasses, a kettle capable of holding water temperatures between 90–96 °C (195–205 °F), fresh single-origin coffees (roasted within 2 to 4 weeks), and notebook or spreadsheet for logging ratios.
- Establish your baseline cup: Dose out 12 grams of each single-origin coffee per 200 ml of water (conforming to standard 1:16.6 brewing ratios). Grind to a medium-coarse consistency (around 700–800 microns for cupping). Pour near-boiling water over the grounds and let them steep for 4 minutes before breaking the crust and skimming off residual foam.
- Taste and evaluate individually: Take small spoons of each coffee and slurp vigorously to distribute the liquid across your entire tongue. Evaluate each origin's acidity, sweetness, and mouthfeel, noting which elements stand out and which are lacking.
- Blend in liquid state: Using your digital scale, spoon combinations into a clean glass. Test a classic 60/40 ratio first (e.g., 60 ml of Brazil base + 40 ml of Ethiopia accent). Evaluate how the acidity integrates into the chocolate base. Adjust in 10% increments (70/30 or 50/50) until achieving perfect balance.
- Mix and rest whole beans: Once you discover your ideal ratio, measure out the corresponding whole bean weights (e.g., 180g of base beans and 120g of accent beans for a 300g total bag). Thoroughly shake the beans in a sealed, one-way valve container and let them sit together for 24 to 48 hours. This allows outgassing ambient aromas and surface oils to homogenize before grinding.
Recommended Blend Profiles and Component Ratios
Selecting the right combinations can feel overwhelming with dozens of origins available. The following reference matrix outlines time-tested blending blueprints used across specialty coffee cafes worldwide for different brew methods and flavor goals.
| Blend Name / Style | Base Component (50–70%) | Accent Component (30–50%) | Target Profile & Extraction Goal |
|---|---|---|---|
| Classic Breakfast Blend | Colombia Washed (60%) | Guatemala Antigua (40%) | Smooth milk chocolate, balanced orange acidity, medium body. Ideal for pour-over (V60/Chemex). |
| Velvety Espresso House Blend | Brazil Natural (60%) | Sumatra Mandheling (30%) + India Robusta (10%) | Heavy body, dense crema, dark cocoa, low acidity. Optimized for 18g dose / 36g yield in 28-30 seconds. |
| Bright Floral & Citrus Blend | Costa Rica Honey (50%) | Ethiopia Yirgacheffe Washed (50%) | Jasmine aroma, bergamot, crisp apple acidity, light tea-like mouthfeel. Perfect for iced pour-over. |
| Modern Mocha Fruit Bomb | El Salvador Bourbon (60%) | Ethiopia Natural Sidamo (40%) | Intense blueberry, dried fruit sweetness, heavy dark chocolate finish. Great for AeroPress and French Press. |
When dialing in these blends using manual pour-over devices like a Hario V60 or Chemex, aim for an extraction yield between 18% and 22% with total dissolved solids (TDS) resting around 1.25% to 1.45%. For pour-over, maintain a strict 1:15 to 1:17 coffee-to-water ratio. If brewing espresso using an 18g basket, target a 1:2 extraction ratio (36g in cup) in roughly 25 to 30 seconds at 93 °C (200 °F) brew temperature to prevent sour under-extraction of dense accent beans.
Troubleshooting Common Home Blending Mistakes
One common pitfall when starting out with custom coffee blending is combining roasted coffees with vastly different roast profiles. Mixing a oily Dark French Roast with a light, highly acidic Scandinavian Light Roast creates severe extraction imbalances. During grinding, light roast beans break down into coarse, dense fragments while dark roast beans shatter into micro-fines. When water hits the bed, channel flow occurs: water rapidly bypasses the dense light roast fragments while over-extracting the dark roast fines, resulting in a cup that tastes simultaneously harsh, astringent, and sour.
Another frequent issue stems from using stale coffee beans. Beans that have rested past their optimal window (beyond 4 to 6 weeks from roast date) lose essential volatile aromatic compounds like aldehydes and pyrazines. Blending stale beans produces a flat, cardboard-like taste regardless of how well balanced your initial ratios were. Always check printed roast dates on your single-origin bags, aiming to blend beans within 14 to 28 days after roasting.
Lastly, overcomplicating the blend setup often leads to muddy flavor results. Adding tiny fractions of four or five distinct origins makes it nearly impossible to isolate and adjust individual components when a cup tastes off. Keep your initial blend recipes simple: master two-bean blends before experimenting with three-bean formulas.
Clear Recommendation
If you are ready to craft your very first custom blend today, start with a 60/40 post-roast combination of a natural-process Brazil (for chocolatey body) and a washed Ethiopian Yirgacheffe (for bright citrus and floral lift). Grind each coffee separately on a quality burr grinder, brew them using a standard 1:16 pour-over ratio on a Hario V60, and mix the liquid brewed coffee first to adjust ratios to your exact taste preference before mixing whole bean batches.
Frequently Asked Questions
Should I blend coffee beans before or after roasting?
Post-roast blending is highly recommended for home baristas and craft coffee enthusiasts. Single-origin beans possess different sizes, densities, and moisture levels, meaning they roast at different speeds. Roasting origins individually allows each bean to reach its ideal flavor profile before being combined into a blend.
What is the ideal ratio for a basic coffee blend?
A classic starting ratio is 60% base bean (such as a chocolatey Brazil or Colombian coffee) and 40% accent bean (such as a fruity Ethiopian or bright Guatemalan coffee). This provides plenty of body and sweetness while allowing unique aromatics and acidity to shine without dominating the cup.
Can I blend pre-ground coffee?
While you can mix pre-ground coffees, it is far harder to achieve uniform distribution, and ground coffee oxidizes within minutes of exposure to air. For optimal flavor clarity, consistent particle size distribution, and balanced extraction, always blend whole beans and grind them fresh right before brewing.
How long should a custom whole-bean blend rest after mixing?
After mixing whole roasted beans in a sealed container with a one-way degassing valve, let them rest together for 24 to 48 hours. This allows the beans to exchange ambient volatile gases and surface aromatic compounds, creating a more cohesive flavor profile when ground and brewed.
Sources
- Specialty Coffee Association (SCA) Protocols & Standards
- Wikipedia: Coffee Cupping Techniques & Evaluation
- Baratza Grinding & Particle Size Guidelines
Looking for the Right Brewing Gear?
Check out our verified Top Coffee Brewing Essentials on Amazon.
As an Amazon Associate, we earn from qualifying purchases.