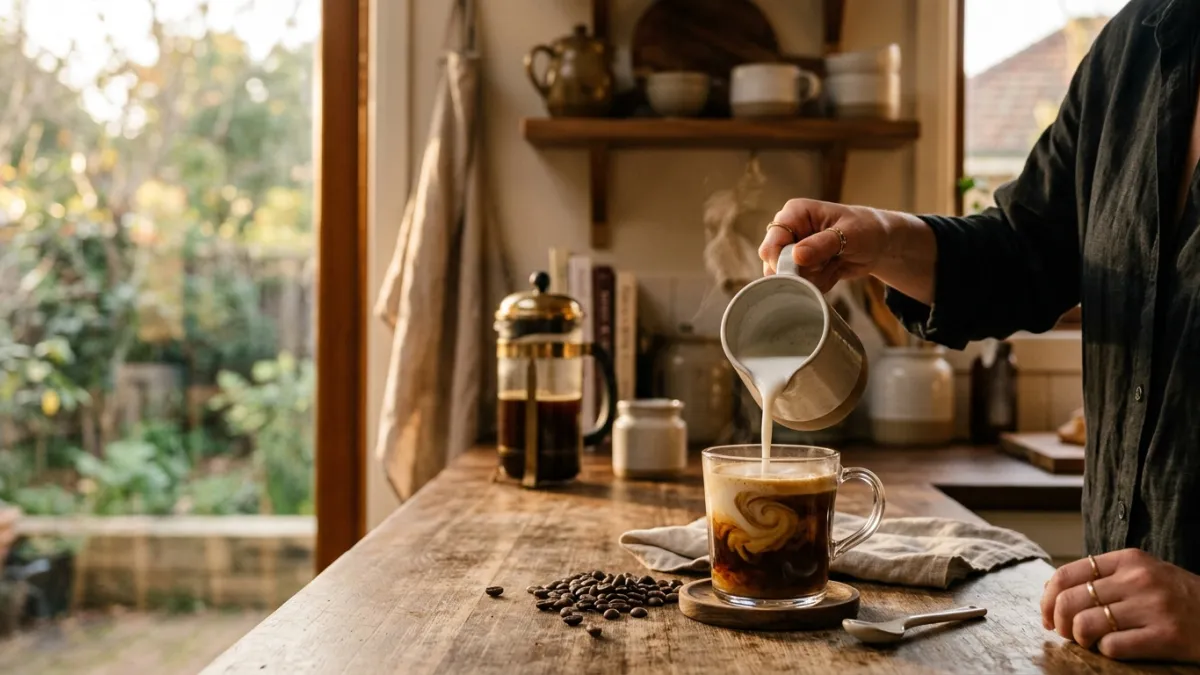
Quick answer: To make a latte without an espresso machine, you need to create a strong, concentrated coffee using methods like a Moka pot or AeroPress, then froth heated milk to a velvety texture using a French Press, handheld frother, or even a jar and microwave. Combine these two elements for a delightful homemade latte.
The Quest for "Espresso": Crafting a Concentrated Coffee Base
While a traditional espresso machine uses high pressure (around 9 bars) to extract a concentrated shot in roughly 25-30 seconds, we can achieve a remarkably similar result in terms of strength and flavor using more accessible brewing methods. The ultimate goal is a brew that's potent and flavorful enough to stand up to the sweetness and body of milk without getting completely lost or diluted. We're looking for a coffee-to-water ratio that significantly intensifies the brew compared to a standard drip or pour-over. For context, a typical espresso ratio might be 1:2 (coffee to yield), whereas a standard drip is closer to 1:15 to 1:17. We'll be aiming for something in between for our "faux-spresso."Moka Pot: The Stovetop Powerhouse for Robust Coffee
The Moka pot, invented in 1933 by Alfonso Bialetti, is arguably the closest you'll get to espresso without investing in an actual machine. This iconic stovetop brewer uses steam pressure to force hot water through finely ground coffee, producing a brew that is intensely robust, concentrated, and often features a distinct crema-like layer on top. It’s a staple in Italian homes for a reason. For an optimal experience, use a medium-fine grind, slightly finer than for drip coffee but not as fine as true espresso. To brew with a Moka pot: Start by filling the bottom chamber with hot water, preferably pre-heated, up to the safety valve line. This prevents the coffee from "cooking" and developing a burnt taste as the pot slowly heats. Insert the filter basket, add finely ground coffee (around 15-20 grams for a 3-cup Moka pot, not tamped down), and screw the top chamber on tightly. Place it on medium heat. Once the coffee begins to bubble into the upper chamber, signalling extraction, immediately remove it from the heat. This prevents over-extraction and a bitter taste. The resulting brew will be strong, full-bodied, and perfect for a latte.AeroPress: Versatility and Pressure in a Plunger
The AeroPress, a relatively modern invention from Alan Adler, is renowned for its incredible versatility, capable of brewing everything from a full-bodied Americano to a highly concentrated shot. It's fast, incredibly easy to clean, and its unique immersion-and-pressure brewing method makes it an ideal candidate for creating our latte base. Its ability to create pressure, albeit less than an espresso machine, helps extract a rich concentrate. For a "faux-spresso" shot, we'll aim for a very low coffee-to-water ratio, similar to what you might use for cold brew concentrate, but with hot water and faster extraction. To brew a concentrate with an AeroPress: Use a fine grind, slightly coarser than espresso but finer than drip. Place a paper filter in the cap and rinse it. Use 20-25 grams of coffee. Add the ground coffee to the chamber, then add just enough hot water (around 80-85°C or 175-185°F) to saturate the grounds completely, typically 50-60ml. Stir quickly for about 10-20 seconds to ensure even saturation and extraction. Then, insert the plunger and press slowly and steadily for 20-30 seconds. The immersion brewing combined with the gentle pressure from the plunger yields a very strong, smooth concentrate with minimal bitterness.Barista's tip: When brewing with an AeroPress for a latte base, don't be afraid to experiment with a slightly coarser grind than you might expect for such a concentrated brew. Too fine, and you risk a muddy, over-extracted shot. A slightly coarser grind allows for a more even press and minimizes the chance of "channeling" – where water finds paths of least resistance, leading to uneven extraction and bitter notes.
Strong French Press or Pour Over: Adaptable Alternatives
If a Moka pot or AeroPress aren't part of your current coffee arsenal, don't despair! You can still craft a respectable latte base using a French Press or a pour-over setup like a Hario V60 or Chemex. The key here is to significantly adjust your coffee-to-water ratio to make a much stronger brew than you would for a standard black coffee. For a French Press: Instead of the typical 1:15 ratio, aim for something closer to 1:8 or 1:10. For instance, if you normally use 30 grams of coffee for 450ml of water, try using 50-60 grams of coffee for the same amount of water. Use a medium-coarse grind and let it steep for the usual 4 minutes, ensuring full immersion. The resulting brew will be exceptionally strong and full-bodied. For Pour Over: While pour-over typically yields a cleaner cup, you can manipulate it for strength. Use a finer grind than you normally would for pour-over, and employ a slower, more deliberate pour technique. Instead of a typical 2:30-3:30 minute brew time, extend it slightly by reducing the flow rate and allowing more contact time. Consider using a 1:12 to 1:13 ratio, slightly higher than standard. This will increase extraction and produce a more concentrated brew, though it will still be less intense than Moka pot or AeroPress concentrates.Mastering Milk Frothing: Velvety Foam Without a Steam Wand
Once you've got your robust, concentrated coffee base ready, the next crucial step is to create that characteristic velvety, airy frothed milk. Forget expensive, bulky steam wands; these accessible methods are incredibly effective and will deliver surprisingly good results. The ideal milk temperature for frothing is between 60-65°C (140-150°F) – hot enough to be enjoyable but not so hot that it scalds the milk, which can impart an unpleasant taste. Whole milk generally froths best due to its fat content, but many alternative milks (oat, almond, soy) have barista-specific versions that froth beautifully.1. The French Press Method: Our Top Pick for Microfoam
Your French Press isn't just for brewing; it's a fantastic manual frother and often yields the closest thing to true microfoam without a steam wand. The mesh plunger works wonders to incorporate air. Here's how: Heat about 6-8 ounces of milk (dairy or non-dairy) in a small saucepan on the stovetop or in the microwave until it reaches 60-65°C (140-150°F). Do not let it boil, as this can break down the milk proteins and affect frothing. Pour the hot milk into your clean French Press, filling it no more than halfway to allow for expansion. Place the lid on, ensuring the plunger is just above the milk surface. Now, vigorously pump the plunger up and down, keeping the mesh just below the surface, for 30-60 seconds. You'll feel the milk thicken and expand significantly. Once frothed, gently tap the carafe on the counter a few times to pop any larger bubbles, then swirl the milk to integrate the foam with the liquid, creating that desirable silky texture.2. Handheld Milk Frother: Affordable and Efficient
These compact, battery-operated wands are incredibly affordable and surprisingly efficient at creating decent foam. They're perfect for single servings and quick clean-up. To use: Heat your milk in a mug or small saucepan to 60-65°C (140-150°F). Submerge the whisk head of the frother just below the surface of the milk. Turn it on and move it up and down gently, incorporating air into the milk, until you reach your desired foam consistency – typically 30-45 seconds. Remember to tap and swirl the milk afterward for better integration.3. Jar & Microwave Method: The Simple, No-Fuss Approach
This method is perfect if you have no specialized equipment at all. It relies on good old-fashioned shaking and microwave heating. How it works: Fill a clean glass jar (with a tight-fitting lid) halfway with cold milk. Secure the lid tightly and shake vigorously for 30-60 seconds. You'll notice the milk doubling in volume and becoming very frothy. Remove the lid and microwave the frothed milk for 30-45 seconds. The microwave step is crucial as it heats the milk and stabilizes the foam, preventing it from collapsing too quickly.Bringing It All Together: Your Step-by-Step Home Latte Recipe
Now that you've mastered both the concentrated coffee base and the art of frothing milk, let's combine them for that perfect, comforting cup. This process should become a seamless flow once you get the hang of it.- Prepare Your Coffee Base: Begin by brewing 2-3 ounces (approximately 60-90ml) of strong, concentrated coffee using your chosen method (Moka Pot or AeroPress are highly recommended for optimal results). Pour this concentrate directly into your pre-warmed serving mug. A warm mug helps maintain the latte's temperature.
- Heat Your Milk: While your coffee is brewing, heat approximately 6-8 ounces (180-240ml) of milk (dairy or your preferred non-dairy alternative) to 60-65°C (140-150°F). This can be done on the stovetop or in the microwave.
- Froth Your Milk: Immediately after heating, use your preferred frothing method (French Press, handheld frother, or jar) to create silky microfoam. The goal is a consistency where the foam is well-integrated with the liquid milk, not just a separate layer of large bubbles. Swirl and tap the frothing pitcher or vessel to achieve this.
- Combine & Serve: Gently pour the frothed milk directly into your mug containing the concentrated coffee. For a classic latte look, hold back the initial, larger foam with a spoon, allowing the liquid milk to integrate first. Then, spoon the remaining velvety foam on top, perhaps attempting some simple latte art if you're feeling adventurous!
- Optional Finishing Touches: Elevate your home latte with a dusting of cocoa powder or cinnamon, or add a drizzle of your favorite syrup (vanilla, caramel, hazelnut) for an extra layer of flavor.
Here's a quick comparison of the recommended coffee brewing methods for your latte base:
| Method | Grind Size | Brew Time | Concentration Level | Pros for Latte | Cons |
|---|---|---|---|---|---|
| Moka Pot | Fine to Medium-Fine | 3-5 minutes | High | Very strong, full-bodied, traditional "espresso-like" taste | Can be prone to bitterness if overheated; requires careful timing |
| AeroPress | Fine | 30-60 seconds (press time) | High | Smooth, clean, highly concentrated; easy to clean | Requires specific technique; capacity limited for multiple servings |
| French Press (Strong) | Medium-Coarse | 4-5 minutes | Medium-High | Full immersion, good body; versatile for frothing milk too | Can have more sediment; less intense than Moka/AeroPress |
| Pour Over (Strong) | Fine | 3-4 minutes | Medium | Clean cup profile; highlights subtle notes | Requires more attention to pouring technique; less robust for milk drinks |