How to Pull a Perfect Espresso Shot at Home: Your Step-by-Step Guide
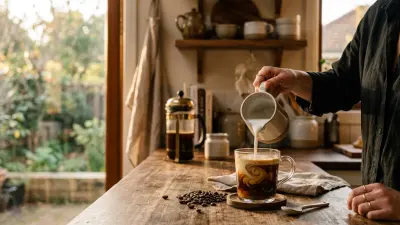
There's nothing quite like the rich, intense aroma and flavor of a perfectly pulled espresso shot. It's the foundation of countless beloved coffee drinks, from lattes to cappuccinos, and a sublime experience on its own. While the professional barista mystique might seem intimidating, we at Coffee Brew Hub believe that mastering the art of espresso at home is entirely within your reach. With the right tools and a little practice, you can turn your kitchen into a personal café and consistently pull shots that rival your favorite coffee shop.
Why a Perfect Espresso Shot Matters
An espresso shot isn't just strong coffee; it's a concentrated extraction of coffee's finest qualities. A perfect shot boasts a balanced flavor profile—sweetness, acidity, and bitterness in harmony—a thick, persistent crema, and a velvety texture. It's the ultimate expression of your coffee beans, and getting it right is incredibly rewarding.
Essential Tools for Espresso Mastery
Before we dive into the steps, let's ensure you have the necessary gear. Think of these as your barista toolkit:
- Espresso Machine: A capable machine that can maintain stable temperature and pressure.
- High-Quality Burr Grinder: Non-negotiable for espresso. Consistency and fine-tuning are key.
- Digital Scale with Timer: For precise measurement of coffee in and espresso out.
- Tamper: A good quality, weighted tamper that fits your portafilter basket.
- WDT Tool (Weiss Distribution Technique): For breaking up clumps and distributing grounds evenly.
- Dosing Funnel: Helps keep grounds contained during dosing and WDT.
- Puck Screen (Optional but Recommended): Helps with even water distribution and keeps your group head cleaner.
- Microfiber Cloths: For cleaning portafilter and drip tray.
- Fresh, Quality Coffee Beans: Roasted within the last 2-4 weeks.
The Step-by-Step Guide to a Perfect Espresso Shot
Patience and precision are your best friends here. Follow these steps meticulously, and you'll be well on your way.
-
Step 1: Prep Your Machine and Portafilter
Warm-up: Turn on your espresso machine at least 20-30 minutes before you plan to pull a shot. This allows the boiler, group head, and portafilter to reach a stable, optimal temperature. A cold portafilter will significantly drop the temperature of your brew water, leading to under-extraction.
Clean the Portafilter: Ensure your portafilter basket is clean and dry. Any old grounds or oils can impart off-flavors.
-
Step 2: Weigh Your Beans
Consistency starts here. For a standard double shot, a good starting point is 18-20 grams of whole bean coffee, but this can vary depending on your basket size and desired strength. Use your digital scale to weigh your beans precisely.
-
Step 3: Grind Your Coffee
This is perhaps the most critical step. Espresso requires a very fine, consistent grind, similar to powdered sugar but not clumpy. Grind your pre-weighed beans directly into your portafilter basket using a dosing funnel to minimize mess. The grind size will be your primary adjustment for dialing in your shot.
-
Step 4: Distribute and Level (WDT)
Even distribution is crucial for preventing channeling (where water finds easy paths through the coffee bed, leading to uneven extraction). Use your WDT tool to gently stir and break up any clumps in the coffee bed. Move the tool in circles and up-and-down motions, ensuring the grounds are evenly distributed. Then, lightly tap the portafilter on your mat to settle the grounds.
-
Step 5: Tamp the Grounds
Place your portafilter on a level tamping mat. With a firm, even pressure (around 20-30 lbs, but consistency is more important than absolute force), press down on the tamper. Your goal is a perfectly flat, compressed coffee bed. Twist the tamper slightly as you remove it to polish the surface. Avoid tamping too hard or unevenly, as this can also cause channeling.
-
Step 6: Flush the Group Head (Purge)
Before locking in your portafilter, briefly run water through the group head for 2-3 seconds. This purges any stale water and ensures the group head temperature is stable. Wipe the shower screen clean.
-
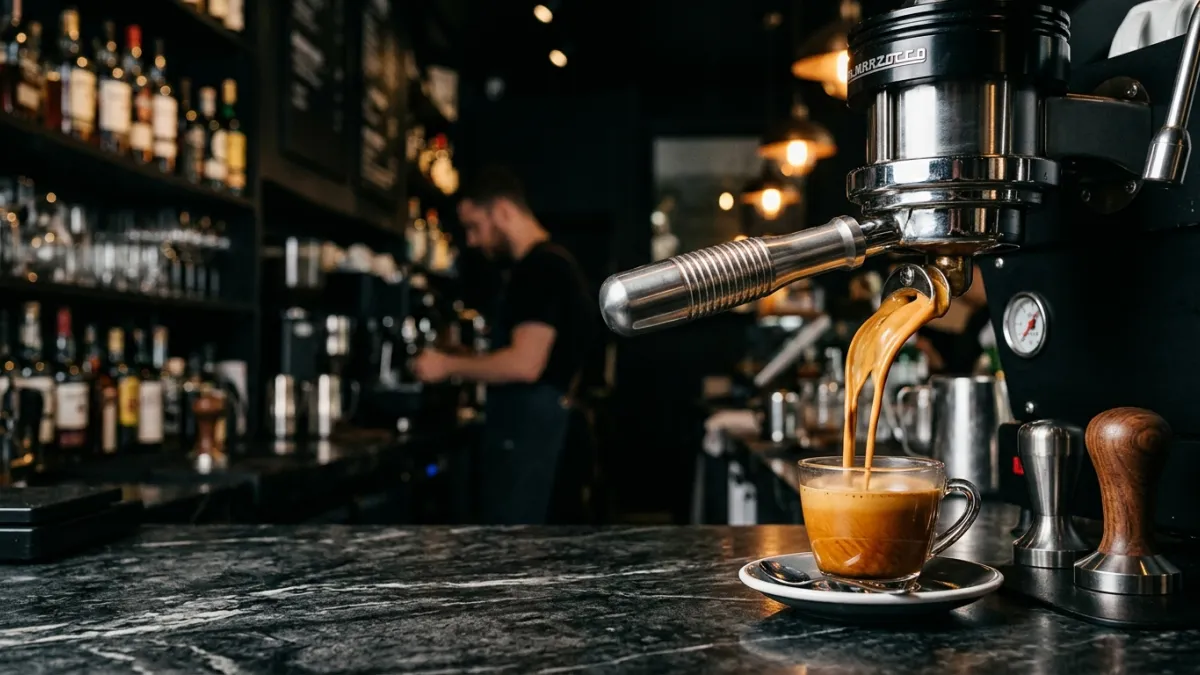
Step 7: Pull the Shot
Immediately lock the portafilter into the group head. Place your pre-warmed demitasse cup(s) on your scale beneath the portafilter. Start your scale's timer simultaneously as you initiate the brew cycle.
Watch for the "God Shot":
- Pre-infusion (if applicable): Some machines have a pre-infusion phase, where a small amount of water wets the puck before full pressure.
- The First Drops: After 5-8 seconds, you should see rich, dark streaks of espresso emerge.
- The Flow: The stream should gradually turn into a beautiful, mouse-tail-like flow, with tiger-striping (varying shades of brown) visible.
- The Time & Yield: Aim for a target yield (espresso out) of roughly double your dose (coffee in). For an 18g dose, aim for 36g of espresso. The ideal extraction time for this yield is typically between 25-30 seconds (from the moment you press the brew button).
Stop the shot when you hit your target yield, regardless of time, or when the stream starts to blonde (turn pale yellow and thin).
-
Step 8: Clean Up Immediately
Remove the portafilter, knock out the used coffee puck, and wipe the portafilter clean. Briefly flush the group head again to remove any lingering grounds. This prevents coffee oils from building up and affecting future shots.
Dialing in Your Espresso: Taste and Adjust
Your first shot might not be perfect, and that's okay! Espresso is about continuous learning and adjustment. Use your senses:
- If the shot is too fast (e.g., 15-20 seconds): It will likely taste sour, watery, and under-extracted. Grind finer.
- If the shot is too slow (e.g., 35-40+ seconds): It will likely taste bitter, astringent, and over-extracted. Grind coarser.
- If the taste is off but the time is right: Adjust your dose (coffee in) or yield (espresso out). A higher yield can sometimes reduce bitterness, while a lower yield can intensify sweetness.
Make small, incremental adjustments to your grinder, one step at a time. Keep track of your dose, yield, and time for each shot to learn what works best for your specific beans.
The Journey to Espresso Perfection
Pulling a perfect espresso shot is a skill that develops with practice. Don't be discouraged by initial failures. Each shot is an opportunity to learn and refine your technique. Pay attention to the sights, sounds, and smells of the brewing process, and most importantly, taste your results. Soon, you'll be consistently pulling rich, beautifully balanced espresso shots right in your own home, transforming your coffee experience courtesy of Coffee Brew Hub!