Unlock Peak Flavor: How to Calibrate Your Coffee Grinder
Hey there, fellow coffee lover! If you're serious about brewing delicious coffee at home, you've probably heard that grind size is king. It's true – the size of your coffee grounds has a massive impact on the final taste in your cup. But simply owning a good grinder isn't enough; you need to know how to calibrate it.
Think of calibration as fine-tuning your grinder to perfectly match your chosen brew method and beans. It's the secret sauce that takes your coffee from "good enough" to "wow!" At Coffee Brew Hub, we believe every home barista can master this skill, and we're here to show you exactly how.
What Exactly is Grinder Calibration?
In simple terms, calibrating your coffee grinder means finding the optimal grind setting that allows for the best possible extraction of flavor from your coffee beans for a specific brewing method. It's not about finding one "perfect" setting for everything; it's about adjusting to get the ideal taste for your pour over, your espresso, or your AeroPress, as each method demands a different grind.
Why Bother Calibrating Your Grinder?
The goal of brewing coffee is to extract the desirable flavors, aromas, and oils from the ground beans. Grind size directly controls the surface area of the coffee exposed to water and how quickly water flows through the coffee bed. This impacts your extraction:
- Too Coarse (Under-extraction): If your grind is too coarse, water flows through too quickly, and doesn't have enough time to extract enough flavor. Your coffee will taste sour, weak, thin, or grassy.
- Too Fine (Over-extraction): If your grind is too fine, water struggles to pass through, staying in contact with the coffee for too long. This extracts bitter, astringent, and unpleasant compounds. Your coffee will taste bitter, hollow, dry, or ash-like.
Calibration helps you hit that "sweet spot" where your coffee is balanced, vibrant, and delicious.
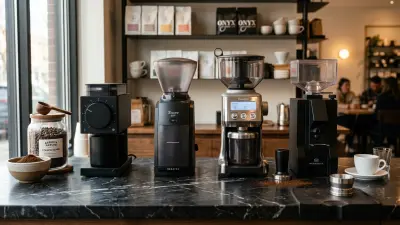
Tools You'll Need
- Your coffee grinder: A good quality burr grinder (manual or electric) is essential for consistent results.
- Fresh Coffee Beans: Always use freshly roasted beans for accurate tasting.
- Digital Scale: For precise coffee and water measurements.
- Timer: To monitor brew times.
- Your Preferred Brewing Device: (e.g., Hario V60, AeroPress, espresso machine).
- Hot Water Kettle: Ideally with temperature control (aim for 200-205°F / 93-96°C).
Step-by-Step: The Calibration Process
- Choose Your Brewing Method: Start by focusing on one brew method (e.g., pour over). Grind size is relative, so what's perfect for a V60 will be wrong for an espresso.
-
Start with a Baseline Grind Setting:
- If your grinder has recommended settings, start there.
- Otherwise, begin with a common starting point: medium-fine for pour over, fine for AeroPress, very fine for espresso.
- For reference, a medium-fine grind looks like table salt, while a fine grind resembles granulated sugar.
- Brew a Small Batch: Use your standard recipe (e.g., 15g coffee to 250g water for pour over). Keep all other variables (water temperature, ratio, bloom time) consistent.
-
Taste and Evaluate: After brewing, taste your coffee. Pay attention to the flavor, body, and finish.
- Is it sour, weak, or watery? (Under-extracted)
- Is it bitter, harsh, or drying? (Over-extracted)
- Is it balanced, sweet, and complex? (Just right!)
-
Adjust Your Grind Setting: This is where the magic happens!
- If your coffee is under-extracted (sour/weak), make your grind finer. This increases contact time and surface area.
- If your coffee is over-extracted (bitter/harsh), make your grind coarser. This reduces contact time and surface area.
Remember to make small, incremental adjustments. Most burr grinders have numbered settings; move just one or two clicks at a time.
- Repeat and Refine: Brew another small batch with your new grind setting. Taste again and evaluate. Continue this cycle of brewing, tasting, and adjusting until you find that perfectly balanced cup.
Brew Method Specific Guidance
Pour Over (e.g., Hario V60, Chemex)
- Target Grind: Medium-fine to medium (like coarse sand or table salt).
- Target Brew Time (for 250-360ml): 2:30 - 3:30 minutes (including bloom).
- Cues: If the brew drains too fast and tastes sour, go finer. If it clogs, drains slowly, and tastes bitter, go coarser.
AeroPress
- Target Grind: Fine to medium-fine (like granulated sugar).
- Target Plunge Time: 20-60 seconds (after desired steep time).
- Cues: If the plunger pushes down too easily and coffee is weak/sour, go finer. If it's very hard to push and tastes bitter, go coarser.
Espresso
- Target Grind: Very fine (like flour or powdered sugar). This is the most crucial method for precise calibration.
- Target Shot Time (for 1:2 ratio, e.g., 18g in, 36g out): 25-35 seconds from pump activation.
- Cues: If the shot runs too fast (under 20s) and is watery/sour, go finer. If it chokes your machine or drips slowly (over 40s) and is bitter/tarry, go coarser.
Pro Tips for Success
- Use Fresh Beans: Coffee stales quickly, changing how it extracts. Always calibrate with fresh beans.
- Change One Variable at a Time: When dialing in, only adjust the grind size. Keep coffee dose, water temperature, and brew ratio constant.
- Keep Notes: Jot down your grind setting, brew time, and taste notes for each adjustment. This helps you learn and replicate.
- Be Patient: Calibration takes practice and multiple small adjustments. Don't get discouraged if your first few cups aren't perfect.
- Clean Your Grinder Regularly: Old coffee oils and chaff can clog your burrs and affect grind consistency. A clean grinder performs best.
Conclusion
Mastering grinder calibration is one of the most impactful skills a home barista can develop. It empowers you to truly understand your coffee and unlock its full flavor potential. By following these steps and trusting your taste buds, you'll soon be brewing consistently delicious coffee tailored exactly to your preferences. Happy grinding, and even happier brewing!